Showing posts with label sewing. Show all posts

Friday, April 5, 2013

Friday Finish: Quick Change Trousers

I finished these adorable pants last night, and I have to say they are the cutest thing ever!!!!!

the back side
The pattern is from Anna Maria Horner's book Handmade Beginnings: 24 Sewing Projects to Welcome Baby.  I have had this book for a while and wish it hadn't taken me so long before making this first pair.  I was intimidated by the sewing pattern, but I shouldn't have been because this project was so simple and quick to make.

the front
 I discovered last night that I had every width of elastic except the 1/2" called for in the pattern.  I will run out and purchase that today, but I was too excited to wait before taking pictures of the pants.  I just had to share them on the blog today! 

cell phone photo
The trousers are reversible and I made one side with all Architextures fabric by Carolyn Friedlander.  I just love this ledger fabric!  It reminds me of my former CPA days and wanted my grandson to have a little bit of that in the first clothing I make for him.  

reversible front side

I wasn't sure if MY son would let HIS son wear graph-paper pants, so I made the reversible side more subdued.  The pants fabric used is still Architextures but only the cuffs show the ledger print.  

reversible back side
I used fabric from the Type collection by Julia Rothman for the back yoke which I think is just adorable here!  I sure wish I had pictures with the cute little guy these pants are destined for, but I plan to visit him soon.  No doubt I will take one or two pictures of him wearing the pants then! 

Linking up with Amanda's finish it Friday.
Happy Friday and happy stitching!!!

Friday, March 1, 2013

Friday Finish: Duffle Bag

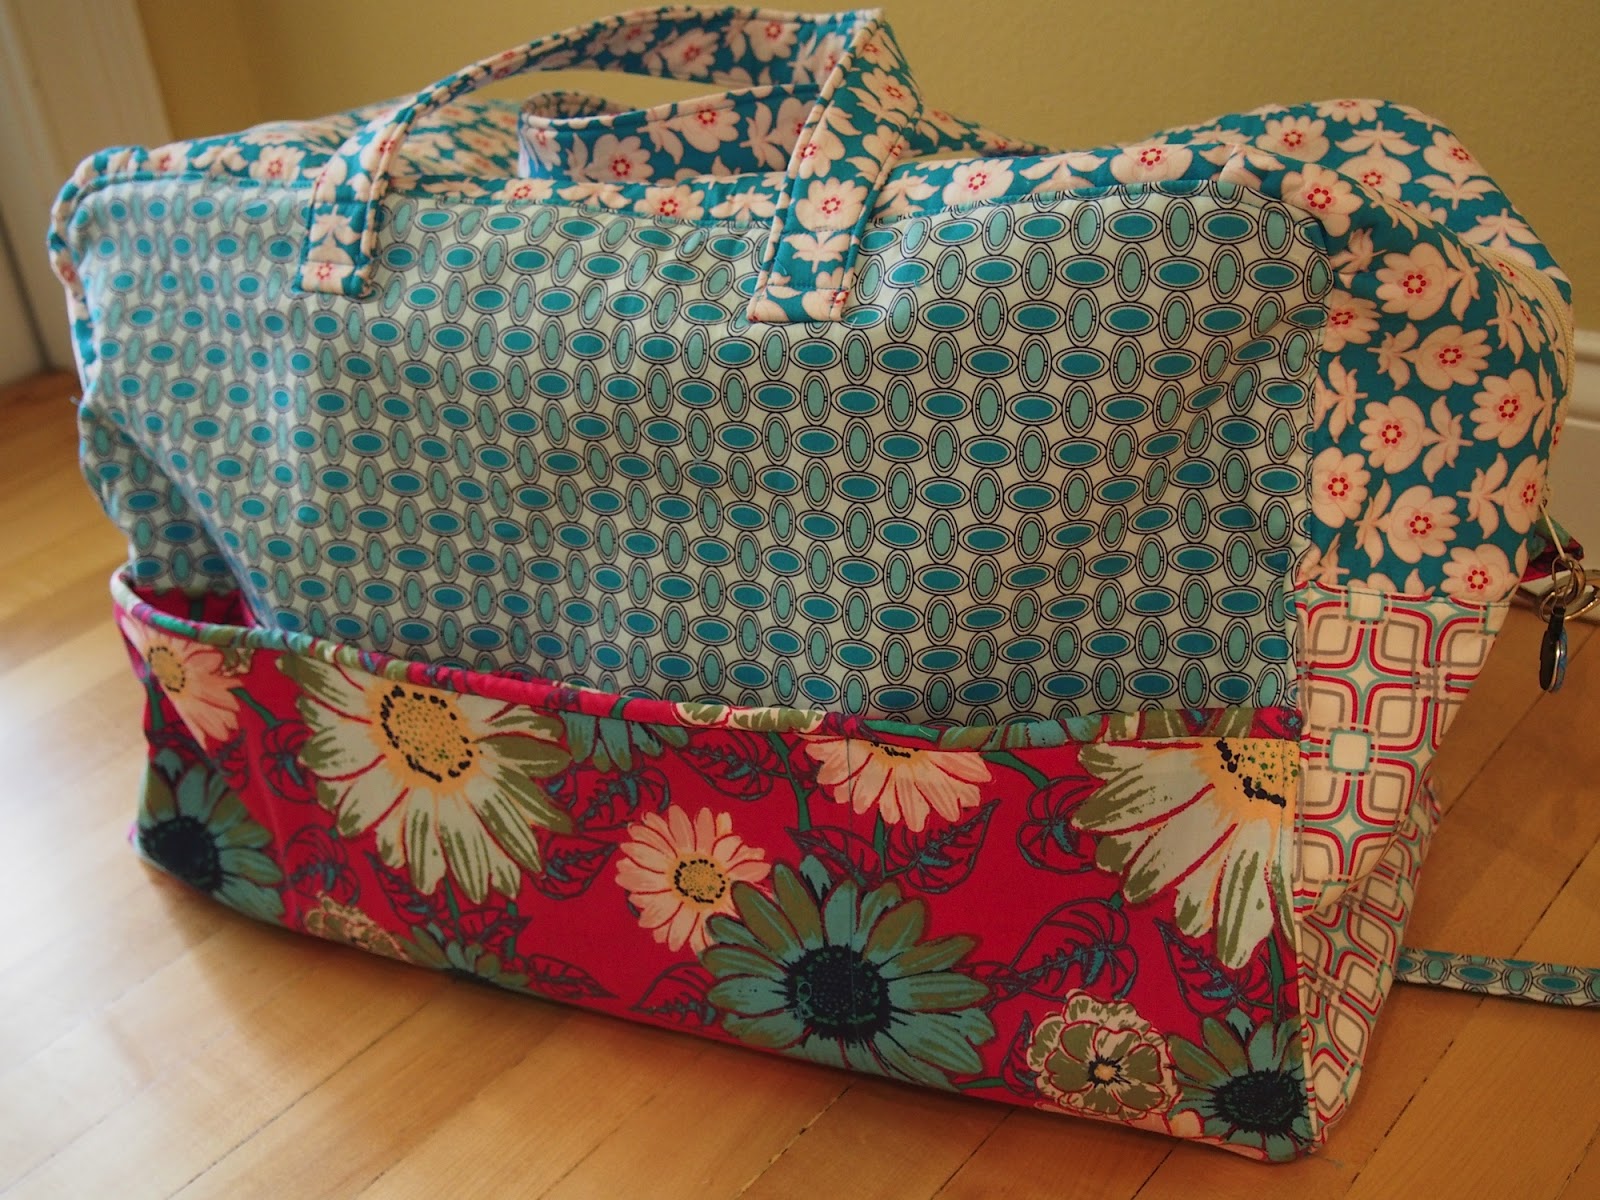
I showed a quick picture of my completed duffle bag before I went to QuiltCon, but this bag deserves a little more attention.

Holiday in London duffle bag
The bag pattern is Holiday in London from BariJ, and all the fabrics are from Art Gallery.

roomy inside
The duffle bag is bigger than I thought, and I ended up using it as my carryon bag for all my fabric.  As with clothes, I tend to pack more than I need, so this bag weighed a ton!

Shoulder strap
The long shoulder strap helped with that extra weight, especially while walking through airports.  I had a dreadful thought that the bag seams would break open and all my fabric would fall out....right as I passed another quilter heading to QuiltCon.  So glad THAT didn't happen!  Remember, this is the first bag I've ever made - a big step up for me from zipper pouches.

removable bottom
I'm not sure you can tell from the picture, but the bag has a removable bottom insert.   The insert cover fabric is a nice contrast to the lining fabric.

pockets and piping
Everything in this bag is lined - even the pockets.  Sometimes I think cutting out the pattern pieces for a project like this takes just as long as sewing the bag together!   Did you notice the piping?  Another first for me.

label inside
  I was brave and used blue thread for my topstitching on the outside of the bag which I think looks nice.  I also stitched my label inside the bag; something I usually forget.

overhead view
The bag requires a very long zipper which I found in the upholstery section of the craft store.

zipper pull
I added a coordinating zipper pull since the zipper color is so plain.

another inside look
I can't tell you how happy I am that my first duffle bag survived QuiltCon and made it safely home in one piece after lugging all that fabric around.  Success!

Holiday in London duffle bag

Here's one more look.  Isn't she pretty?!

Thanks for stopping by.  Happy stitching,

Monday, October 22, 2012

Mini Monday: Pajama Pants

In an attempt to learn how to sew expand my sewing skills, I tried my hand at a pair of PJ pants.  I used this tutorial I found while browsing the internet. 

PJ bottoms
There are quite a few tutorials out there, but I like the only-one-seam feature of this particular pattern.  I would have liked more instruction with certain aspects, but they are probably sufficient for someone who sews regularly.

Step One:  make your pattern
The first step is making the pattern.  I used a pair of PJ bottoms from my drawer and a roll of craft paper I have had since my oldest was a kindergartener.  There is an advantage to hoarding! 

Gorgeous Karavan fabric
 The fabric is Valori Wells Karavan from my stash.  The pattern is pinned on the fold to alleviate one of the seams.  In addition, I doubled up the fabric so I only had to pin and cut once.  

Self portrait
I deviated from the pattern in that I didn't add contrasting cuffs because I wanted a fuller, capri style bottom.  Even though there is room for improvement, I am pleased with my first pair!

On to the next pattern
For the next pair, I am planning more of a lounge pants style that is roomier in the waist and longer.  I might even try adding the contrasting cuff.

Happy stitching!  Thanks for stopping by,