Wednesday, March 20, 2013

What's Up Wednesday: Sewing Time

I enjoyed some quality sewing time today on this rainy first day of spring Wednesday.

36 patch blocks
Four more 36-patch blocks are pieced for my Cowboy/Cowgirl quilt.

Shoo Fly block
April's OrlandoMQG block of the month is done.  I have made many a shoo fly block, so don't know why I had to pull out my seam ripper not once but twice while piecing this simple block.  We followed this tutorial for making the 12.5" blocks.  For my block I used scraps of Architextures fabric.

Oops
I finished the quilt top for a gift several months ago but wasn't happy with one particular section so it was put aside.  Today, I pulled the quilt top out and unstitched then restitched the offensive area.

Unstitching
The quilt top and quilt back are now ready for basting.  I am showing just a tiny peek in case the recipient pops over for a look ;-)

Sneak Peek
 So far I have maintained the organization of my fabric stash as I have pulled, sewed and acquired new fabric.  My family is quite in shock that The Lab is still clean!

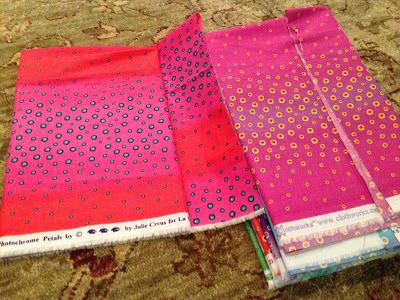
Fabric additions
These three yards of fabric arrived today, and I immediately wrapped them neatly around my comic book boards.
Hope you enjoyed your first day of spring.  Thanks for stopping by,

Monday, March 18, 2013

Mini Monday: Bee Block

I had so much fun selecting fabrics for this month's MCM Bee block!
Having all my fabric sorted by color, including my scraps, had a big something to do with the fun. I knew right where to find the grays and low volume/value prints required for this block recipe.  

March MCM Bee block
Debbie chose this hugs and kisses block but requested grays instead of white and low volume/value fabrics instead of bright prints.  This is the first time I've made such a block, and I really like the way all the fabrics play together.  Fourteen different fabrics were used in making this block.  There are many favorite prints represented here including Carolyn Friedlander's Architextures, Lizzy House's Charm Bracelets, Denyse Schmidt Hope Valley, two different Comma prints, scraps from other projects, and even some QuiltCon swag!

baby HSTs
I learned from making the siggy swap blocks that if you stitch an extra seam 1/2" away from the original seam before trimming, you end up with cute baby HSTs for future projects. 

small basket holding baby HSTs
 I have a basket full of them - see there on the shelf?!  This bee block is very similarly made, so I did the same thing.  It's nice to add more to my collection.

Happy stitching and thanks for stopping by!

Sunday, March 17, 2013

Happy St. Patrick's Day!

It seemed fitting that I finished hand stitching the binding on my Green Peace quilt today - St. Patrick's Day!

Green Peace Quilt
My friend Shelly quilted this one for me, and I am so pleased with the results!  I have never had a quilt top custom quilted before.  It's difficult to see the quilting detail in the pictures, especially on the quilt top.  Shelly quilted flowers in the centers of the green peace blocks with green thread.  For the background, she used black thread to quilt a chevron pattern and then quilted various filler designs in between the chevrons.  The texture is just incredible!

The back
The backing fabric is pieced from three different Paradise prints from Studio e.  You can really see the quilting detail on the back.  I just love the quilting plan Shelly came up with.  

close up of binding and backing
For the binding, I used a Denyse Schmidt Flea Market Fancy print which turned out to be a genius idea.  When hand stitching the binding, I noticed coincidentally that the flower design is repeated in the binding.  Cool, huh?!

close up of quilting
Here's a close-up shot of the flower design quilted inside each of the green HST blocks.  Doesn't it look like the flower sketch on the binding strips?  

Green Peace Quilt finished
Thanks to comments left by Cindy and Carla on my original quilt post, I am entering my Green Peace Quilt in the Pantone 2013 Emerald Quilt Challenge.  You can read more about the making of this quilt here.

Recap of quilt stats:  finished size 75"x75"; Peace Quilt pattern designed by me; fabrics used include Kona solids in Fern, Emerald, Jade Green, Lime, Sprout, Chartreuse, Kiwi, Honey Dew, Leprechaun, Pear, Jungle and Holly as well as scraps of unidentified Kona solids and shot cottons; background fabric is Mama Said Sew by Sweetwater; backing fabric Parade by Studio e; binding fabric Denyse Schmidt Flea Market Fancy; quilted by Shelly of Prairie Moon Quilts 

Happy St. Patrick's Day and happy stitching!
 Thanks for stopping by,

Friday, March 15, 2013

Friday Finish: Eye Candy

Well, it's not your typical finish, but for me it's a major accomplishment.  
My fabric is now neatly folded and sorted and stored by color/category.  Whoo hoo!!!!  I guess you could say this project has been a WIP for a very long time ;-)

Isn't it pretty?!
I was about 95% finished with this huge task when my middlest came home from college for his spring break, so I took a break too.  I took advantage of him being out of the house for a dentist appointment today to complete the remaining 5%.

Home Decor fabrics and stripes
I have to tell you this finish feels so good!!! Having all my fabric neatly arranged so I can actually see what I have is huge.  This process also made me realize (well, confirmed actually) that I have way too much a lot of fabric.

Ikea shelves
If you read my previous posts and/or followed my pictures on Instagram, you know that I used Jennifer's tutorial for wrapping my fabric around comic book boards.  I may or may not have made more than one trip to my local comic book store for the required amount of boards.

Some of my solids
Want a little tour of my shelves?  I'd love to show you around my fabric ;-)  
The above picture shows the two shelves that hold my solids.  The top shelf has a bin for solid scraps and mini bolts of shot cottons and linens. The other shelf holds the remainder of my solids.  If you compare the pictures above and below you can see that I have two rows of solids stored in one shelf.

Baby fabric, low volume and solids
I left my batik fabrics alone because they already look pretty folded as they are.  I have a shelf of fabrics dedicated for baby quilts and another for low volume fabrics and some special fabrics that I don't want to get lost in the crowd.  There is also a shelf for quilt books and a picture of my lovely sister.

Kaffe, browns and blacks
 I have collected quite a few Kaffe prints for an eventual Dear Jane quilt so those have their own shelf.  Below that is a shelf for browns and blacks.

Precuts
This shelf holds some of my latest precuts and some hand dyed fabric.

binding strips
I also have a shelf for my ipod stereo and binding strips.

Oranges, precuts and scraps
Here are my orange fabrics, a basket for scraps, shelf fore more precuts and a shelf for scraps of neutrals hidden behind a basket of paper hexies and a jar of binding strips.

Books and color
 You'll notice that I don't have many yellows or purples so they share a shelf.  Behind the Pillow Pop book are containers of scraps by color.  The glass jars you see here and there are for smaller scraps by color.


I am surprised that all my blues fit on one shelf though there are two rows of mini bolts on that shelf.  You'll see again more plastic containers holding scraps by color.  I'd like to pretty those up at some point, but for now it works.  There are a few colors of minky that I didn't bother wrapping but instead folded and put next to the scrap bins.

backing fabric and more scrap baskets

 The bottom left shelf holds backing fabric that I have acquired on sale.  The shelf to the right of that has another basket of scraps.  This one holds strips.  There is also room for a couple of quilt books there and extra comic book boards.  After prettying up my scrap organization I want to tackle my quilt books.

Well, thanks for stopping by and letting me share a small part of my studio with you.  Linking up with Amanda's finish it Friday.
Hope you find some time to sew this weekend.  It's Worldwide Quilting Day on Saturday!!!!

Monday, March 11, 2013

Mini Monday: Spring Cleaning

The fabric organization is ongoing here.   I have now made a THIRD trip to the local comic book store for more boards.  They even gave me a frequent shopper punch card!  I am determined to tame organize my fabric stash before I do any sewing, but I'm beginning to think I will NEVER reach the bottom of my fabric pile.

Topsy Turvy Triangles
  Since I have no sewing project to share today, I want to show you the mini quilt my friend Michele made for the Alzheimer's Art Quilt Initiative.  I just love the movement of the teeny triangles.  This was my February Quilt a Month purchase, and it looks so pretty in front of my neatly folded fabric stacks.

Getting there
Here's a glimpse of my folding-fabric-around-comic-book-boards progress.  I haven't had a chance to organize by colors yet; I am just placing the fabric on the shelves as I go along to get them off the floor. The rearranging by colors/theme/designer will be the fun part!

Hope someone is getting some stitching time in.  Thanks for stopping by,

Wednesday, March 6, 2013

What's Up Wednesday: Good Stuff

Today marks the start of the OrlandoMQG's fourth year!  Whoo hoo!  I paid my dues and got a cool coffee mug with our logo.

March BOM
 Our block of the month for March is the Garden Fence made with modern grays and yellows.  I'm looking forward to making next month's shoo fly block too.  

mini quilt for AAQI
Many members participated in the Madrona Road Challenge and created beautiful blocks and quilts.  I made a mini quilt for the Alzheimer's Art Quilt Initiative by machine piecing tiny hexagons (as learned in my QuiltCon class) then machine appliquéing them to a solid background pieced in the text fabric. 

outdoor dining
Several guild members dined alfresco at a nearby restaurant after the meeting.  The food and company were wonderful.  After our QuiltCon adventure, we were missing eating meals together ;-)

new pincushion
Forgot to show the pincushion I received from LAMQG member Licet in a QuiltCon swap.  The pinsies were purchased from this etsy shop.

folding fabric
 When I left for QuiltCon, my sewing room (aka The Lab) was a disaster.  For some strange reason, it was still a disaster when I returned!  I took a picture of the room which even shocked my sister.  After that, I decided something had to be done.  

progress
I pulled out the package of comic book boards I had purchased after seeing That Girl That Quilt's neat and tidy sewing room, and over the weekend I spent some time using Jennifer's fabric folding method in an effort to tame the fabric mess.  

organized fabric
You won't believe how quickly I used up that package of comic book boards.  I had to make an emergency run to the local comic book shop for more.  You think this will enough to organize my stash?

comic book boards
I'm going to be in big trouble if it isn't  ;-)

Hope you have a wonderful Wednesday.  Thanks for stopping by,

Monday, March 4, 2013

Mini Monday: Blocks and Such

First little bit of sewing since returning from QuiltCon:

February MCM Bee block
Already I'm behind in my bee blocks.  Cindy requested the winged square block for February's Mid-Century Modern Bee block.  I enjoyed selecting the fabrics for this one, and the tutorial is easy to follow.  I had to throw in a shot cotton for Cindy.  Can you spot it?

Here's a little bit of sewing done at QuiltCon:


Diamond blocks
 Elizabeth's Marmalade quilt making class was only a half day.  After making my templates, I managed to piece two diamond blocks.  I am looking forward to more strip piecing now that I have access to my full stash of fabric.

Paper piecing
 I showed these paper piecing blocks from Penny's class before, but I can't resist showing them again.  The cupcake is the only one paper pieced; the others were made with the freezer paper technique.  We even learned to stitch y- seams.  Not bad for a beginner.

Hexagons
More y-seam stitching in Jacquie's machine pieced hexagon class.  I mentioned before that I did more talking than sewing in this class (which was also a half-day class), but I did pay attention to the teacher and learned the technique ;-)  Today I did more hexagon fabric cutting for another project I have in mind.

Thanks for stopping by.  Happy stitching,

Friday, March 1, 2013

Friday Finish: Duffle Bag

I showed a quick picture of my completed duffle bag before I went to QuiltCon, but this bag deserves a little more attention.

Holiday in London duffle bag
The bag pattern is Holiday in London from BariJ, and all the fabrics are from Art Gallery.

roomy inside
The duffle bag is bigger than I thought, and I ended up using it as my carryon bag for all my fabric.  As with clothes, I tend to pack more than I need, so this bag weighed a ton!

Shoulder strap
The long shoulder strap helped with that extra weight, especially while walking through airports.  I had a dreadful thought that the bag seams would break open and all my fabric would fall out....right as I passed another quilter heading to QuiltCon.  So glad THAT didn't happen!  Remember, this is the first bag I've ever made - a big step up for me from zipper pouches.

removable bottom
I'm not sure you can tell from the picture, but the bag has a removable bottom insert.   The insert cover fabric is a nice contrast to the lining fabric.

pockets and piping
Everything in this bag is lined - even the pockets.  Sometimes I think cutting out the pattern pieces for a project like this takes just as long as sewing the bag together!   Did you notice the piping?  Another first for me.

label inside
  I was brave and used blue thread for my topstitching on the outside of the bag which I think looks nice.  I also stitched my label inside the bag; something I usually forget.

overhead view
The bag requires a very long zipper which I found in the upholstery section of the craft store.

zipper pull
I added a coordinating zipper pull since the zipper color is so plain.

another inside look
I can't tell you how happy I am that my first duffle bag survived QuiltCon and made it safely home in one piece after lugging all that fabric around.  Success!

Holiday in London duffle bag

Here's one more look.  Isn't she pretty?!

Thanks for stopping by.  Happy stitching,